Wednesday, May 26, 2010

Father's Day Tie Napkin

I am so excited to have my cousin Amy from Our Daily Obsessions guest posting today.
Amy is an amazingly talented person...I wished we lived closer and we could have some seriously fun crafting and decorating parties. But as for now, I'll just keep blog stalking her, and her cute ideas. If you like Amy's guest post, please be sure to visit her and become a follower.


I am so excited to be posting on Miss Crafty Pants today! Thank you so much, Erika, for giving me this opportunity. (Erika may or may not be my oh, so talented cousin who I have tried to emulate for so many years.) My name is Amy and I have a little, ole blog called Our Daily Obsessions . Here's a little about me:

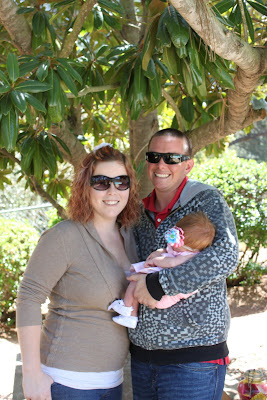
I've been married to my law studying hubby for almost 4 years and we have the cutest little two year old (don't you agree?). I'm a part time nurse, full time mama, and in my spare time am obsessed with crafting, decorating, spray painting, gardening, sewing, baking, photography, . . . and basically the list could go on and on.


Come check it out. I'd love for you to stop by.

In the meantime, here's one of my latest projects. Father's Day is getting closer and I thought this would be perfect. Enjoy!

I was in a boutique a few months back in Newport Beach and saw the cutest paper napkins for Father's Day. They had printed a tie on the paper napkin. I thought this would be pretty easy to recreate on a cloth napkin, and it was.
Have you seen those baby onesies with the appliqued ties on them? Basically the same concept . . . just on a larger scale.


The supplies you need are:

1. a cloth napkin
2. material for the tie
3. wonder-under (or anything similar - I bought mine at Joanns)
other supplies: sewing machine and iron

1.Have your supplies out and create your pattern. (I used one of my husband's ties)

2. Using the pattern, cut out the material.
3. Following the instructions of wonder-under and attach it to the fabric

4. Iron the fabric/wonder-under onto the cloth napkin (using a damp cloth on top of the material and steam iron)
5. The tie is now attached to the cloth napkin, but to reinforce it, you'll want to just sew a straight line or zigzag stitch around the tie.


And you're done! You just have to give it to your father/husband. (Now really, I'm sure your hubby isn't so messy when he eats that he needs a huge, ole napkin on his chest or maybe he does, but it's a fun idea for Father's Day. ** If I were to do it again, I'd make the tie a little bit shorter)
If you want to add a little personalization, have your kiddos write a special note to him on the cloth napkin using a permanent marker or maybe put their handprints on it.
Thanks for having me on your blog, Erika. And I hope you all enjoyed it.
Adorable Display Board

Today we have Aleesha from Ready, Set, Create!! I'm a total fan of hers. If you've never visited her blog, it's about time you did! You don't want to miss great posts... such as these Chocolate Dishes!!! If you like what you see, please visit her blog and become a follower.

Hello there all you Crafty people!
I'm so excited to be here on Miss Crafty Pants, Thanks Erika for having me as your guest today!
Here is a little about me. . .

I'm Aleesha from Ready, Set, Create!!
I'm a fun lovin, picture taking, book reading, bargain hunting, scrapbooking, twenty-something girl.

My true love is my hubby. . . We've been married just over three years.
(I'm the one next to that super cute guy!)

My blog is where I share and catalog all my crafty endeavors.


You can find a little bit of everything there, from yummy treats to home decor.
Feel free to stop by and let me know what you think.


Here is one of my recent projects that I'd like to share with you.

Have you seen some of the various display boards out there in blogworld?
I made my own variation that turned out so totally fab, so I thought I'd show you!

Supplies;
A piece of wood at your chosen length
Some Jumbo wooden paperclips - as many as you'd like
Fabric - two different colors
Mod Podge
Hot glue gun
Embellishments

Start with your board and which ever fabric you'd like to cover it with.
Cut your fabric slightly larger than your board. (Make sure that you have enough to cover the sides and part of the back.) Give the front side of your board a coat of Mod Podge and lay the piece of fabric you cut right on top. Smooth it on and let it dry.
Once it is dry flip it over and mod podge the edges of the fabric down on the back. (Sorry I don't have a pic if this step) Don't worry about how the back looks, nobody is ever gonna see it! Next put a coat of mod podge on the top of the fabric on the front side. This will make the paperclips stay on better.
While it dries we will cover the paperclips with fabric. Trace around the front of the clip on the fabric and cut it out.
We're going to stick this fabric on the same way as we did on the board, One coat of mod podge on the bottom, then fabric, then another coat on the top.
Once its all good and dry, we'll stick it all together with the glue gun. Just glue the paper clips right on the board where ever you want them to go. Last stick on a few embellishments, whatever you want. I added a few buttons to mine to give it some extra awesomeness. :)
Find a good place to hang it, and there you go! So Cute!

Well there you have it. . . a little about me and a little craftin.
Thanks again Erika for having me today!


Monday, May 24, 2010

Eggs or Nuts Need not Apply

I made it to UTAH! Yay! I'm a little jet lagged, but happy to be here! Today we have Jenny from Eggs or Nuts Need Not Apply. Although no one in my family is allergic to eggs or nuts, I still found Jenny's information helpful and informative. I actually use a lot of flax seed in my cooking and love it. If you know someone who may be allergic to either of these foods, please be sure to refer them to her blog!!! Thanks Jenny!

My name is Jenny and I am a wife and SAHM to two little boys. Our oldest we call Danger and he's just about to turn three. Our baby is nearly ten months and we call him Tater, like the tots. Of course these aren't their given names, just what we call them on blogs. Moving on... About a year and a half ago, my oldest was diagnosed with severe allergies to both eggs and nuts. Not fun. I'm sure there are many of you dealing with the same or similar issues with your children. Anyway, after discovering these allergies I became obsessed with reading labels and quickly realized that everything "may contain traces of eggs, nuts, etc....". Everyone's afraid of being sued, right? Not that I blame them, but it makes it very difficult to find food to feed a child who can't have these ingredients that just might be in everything! I just couldn't stand my son not being able to eat pancakes, waffles, cookies, all the good things in life, really. Meet the mother who now makes everything from scratch, well a lot of stuff a least.
So I started a blog that includes resources for those with egg and nut allergies as well as recipes that have neither eggs or nuts. Click here if you want to see that.


The reason I'm here guest posting today is to do more of an educational post, rather than a crafty post. I hope you're not all disappointed, just stay with me.


One of the greatest things I've discovered since my son was diagnosed with his egg allergy is Flaxseed, specifically flaxseed meal or ground flaxseed.

What's so great about flaxseed, you ask? The three following ingredients make it so:
  1. Omega-3 essential fatty acid, shown to have heart healthy effects
  2. Lignans, which have both plant estrogen and antioxidant qualities
  3. Fiber, both soluble and insoluble.
Some even say it can help reduce your risk of heart disease, cancer, stroke and diabetes. I'm not promising that. :)

What can ground flaxseed be used for? A million different things, really. You can use it to add nutrition or you can use it as an egg substitute. I like to sprinkle it in yogurt, oatmeal and applesauce. I also use it in granola, granola bars, pancakes, waffles, cookie dough, and the list goes on. For those of you who are pregnant and are going crazy because you aren't able to eat cookie dough right now(or maybe you're not pregnant and the thought of eating a raw egg makes you ill but you really love cookie dough), I'm your new best friend. Make your favorite cookie dough but substitute the flaxseed for the eggs! Keep reading for details on how to do that. Along with the foods mentioned above, you can use it in most recipes that call for egg including quick breads, rolls, muffins and cakes. I can't guarantee it will work in all of those, but I've yet to try it in something that didn't work.

How does it taste? Some say it has a little bit of a nutty flavor to it (but it's NOT a nut). I can't put my finger on what it tastes like to me but it's very mild, whatever it is.

Where can you get it? It will usually be on the baking aisle in nearly every grocery store. I've also found it in the refrigerated section in the health foods area. I shop at five different grocery stores and I've found it in all of them. I also know they sell it at Sam's Club and Costco. If you buy the small, one pound bag that's in the picture, it ranges from $3-$5 which might sound expensive but you use it in really small quantities. I have only had this brand because it's the easiest for me to find and I like it.

How do you substitute flaxseed for eggs? One Tablespoon of flaxseed meal and three tablespoons water equals one egg. Let sit for two minutes then add to recipe. This is usually listed on the side of the package, in case you forget.


Well, I hope taking a break from crafting wasn't completely disappointing and I enlightened a few of you. Thanks Erica for having me and thanks to all of you who didn't close the window after seeing this wasn't a tutorial. Now back to crafting!

Friday, May 21, 2010

3D Photo Collage

Today we have Michelle from Land of the Misfit Toys. I recently came across her blog and have been in love ever since. I almost feel like family, as I was anticipating the arrival of her baby girl just as a family member would have. (She is soooo adorable BTW).
Michelle has tons of other crafty tutorials posted on her blog, so be sure to visit and say "Hi".


Hello Miss Crafty Pants readers!!!!

I am so excited that Erika let me take over her blog today! I am Michelle from Land of the Misfit Toys where I document my family's life as well as my slightly out of control craft addiction. My husband and I have been married for just over a year now but have been together almost 7 years and I just gave birth 12 weeks ago today to our very first, beautiful baby girl, Avery Blayke. I used to be a Preschool teacher but now I am finding that I love nothing more than to being a stay at home mom and taking care of my family. Also, my husband and I are caregivers to a wonderful young gentleman with Fragile X, a form of austism, who lives with us and we have known for years. But my blog title comes from our crazy group of 2 dogs and 5 cats that all are misfits in their own right, they are all rescues that have found their way to our home; because we can't say no to a cute face.

But enough with the pictures and stories, because really, I could go on all day... On with the craft!!!

I made a 3D photo collage frame from some simple card board boxes I got at the craft store-


that cost me a total of 4$ and came out like this:


Here is what you need:
  • 4 (or more) small cardboard boxes
  • Sponge brushes
  • Paint in the color of your choice
  • Mod Podge
  • Scrapbook papers
  • Pictures
  • Hot Glue


First I painted all of the sides of the boxes and lids with the brown acrylic paint.


Then I cut my scrapbook paper to fit the boxes and lids, I did the lids with the brown polka dot paper and the boxes with the stripes. I attached the paper with the Mod Podge to the top of the lids and bottom of the boxes.


Next I played around with the layout, I started with one size and shape because I wanted to explore the idea, but many shapes and sizes of boxes and lids could be really interesting to try next time.


Once I found a layout I liked, I looked for the pictures I was going to add and cut them down to fit the boxes which was 3.5 inches square for my project. You could treat this like a big scrapbook page with journaling and embellishments but I chose to go the simple route and treat it like a picture frame.


Then I hot glued the boxes together; I did the top and bottom rows separately, then attached the middle boxes to the top row and last, the bottom row to the middle. Next came the pictures, these I also hot glued on.

That's it! Easy, huh?!

Here are some other projects I have done:


Ribbon Storage Box (from a shoe box).


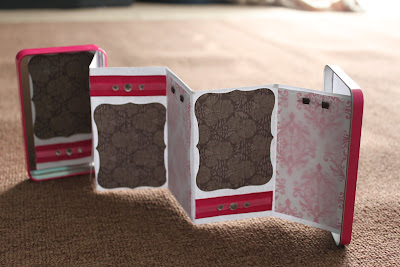
Mini Scrapbook or Brag Book (using a gift card tin).


Tons of Bows.


Cards and Invites.


Party Favors like Covered Candy Bars,

and more! I love trying new projects and using new materials, I can't wait until my baby can craft with me!

Thanks Erika for inviting me!

Wednesday, May 19, 2010

Statement jewelry

Today we have Beq from halfway around the world...where is she from you ask? I think the first word she typed will give it away!!! I am so excited to have a real life fashion designer guest blogging today. I must say that this is a crafty pants first!
Please be sure to visit Beq's blog. She's amazing!


(Image- Photographer: Scott G Trenorden, Model: Amanda MacDonald)

G'day Miss Crafty Pants Readers....

...Thanks Erika for this opportunity to share my designs with your readers...

To introduce myself to you all - my name is Rebecca Timson. I live in Perth, Australia.
In 2005 I changed up a successful career in Sports Management to study - FASHION!!!
Since then, I have been fortunate to have had quite a bit of success. I was featured in a national magazine called Box Magazine and have had my designs in a number of runway shows. You can see more of my designs at beqdesign.blogspot.com.
Today I am going to share with you some of the statement jewelery that I designed specifically for the runway. Statement jewelery is a great way of sprucing up an outfit. It adds drama and if done well, enhances and compliments your collection. Like most catwalk designs you can't always wear them as everyday pieces but with a bit of tweaking you can change them into trendy easy to wear accessories.
Here are some of my designs from a runway show December 2009.


(Images above- Photography by Penny Lane, Model: Kelly Holmes from Scene Model Management)


(Images above - Photography by (left) Penny Lane, (right) Karen Cheng, Model: Stephi Mclean)


Tutorial

How to french knit a Necklace: This is the easiest piece of jewelery you will ever make. All you need is:
  • Wire of your choice (I used Designer Wire 20 gauge Gold 2x 10m bags)

  • French knitting Kit also known as spool knitting or corking (you can usually pick this up from your local craft supplier or knitting and yarn shops)

  • and a jewelery clasp (I used a magnetic three prong gold one that I picked up from a bead supplier).


1. If you know how to french knit all you have to do is french knit the wire to the length you desire (If you're unsure of the length, drape a piece of string around your neck and use that as your guide). Cast on and off the same as you would yarn. If you don't know how to french knit check out this youtube video to see how, keeping in mind you will be using wire instead of yarn. If your wire is too think you will need to use pliers instead of a hook.

2. Squeeze each (finished) end in on itself so it is easy to add the jewelery clasp.

3. Sew on the clasp using wire (you may need to get some thinner wire if your wire is too thick for the clasp loops).


Your necklace is ready to wear!!! You can add or vary depending on what you want. I used this necklace at my last runway show. I added a bunch of thinner french knitted wire to the front of the necklace for more volume.


(Images above- Photography by Penny Lane, Model: Kelly Holmes from Scene Model Management)


Good luck and I hope this tutorial inspires you to make some costume or statement jewelery for yourself.

Send me a message on my blog to let me know how you go and if you have any questions.
Take care!


Ta


Rat Trap Wonder & Organizing Car Papers

Today we have Becky from Random Acts of Obsession. I am so excited to have her joining us today. She's new to blogging and I think she's done a wonderful job so far. I have high expectations for her and I know she will continue to grow and do just fine in the blogging world. If you like what you see, please be kind and visit her blog. And If you REALLY like what you see, please become a follower on her blog.

That's me: Becky, husband: Sam, and daughter: Berkely.
Hello readers of this DARLING blog! I am thrilled to post here today. I am the author of my family blog, where I mostly chat about motherhood and daily life. I am also the newly acclaimed author of Random Acts of Obsession where I post about Random things that I get Obsessed about. LOL! So, enjoy my latest obessions!


1.Rat Trap Wonder:
I know. Rats are grose, so are their traps, but not any more!


Okay, So you get a rat trap. You can also use a mouse trap, it is just smaller, I wanted to go big!
Then you pry off the metal hardware. I took off everything but the spring at first.
Gathered my loot. Paper, paint, ribbon, modge, etc.
Painted the Rat Trap and HATED IT!!! I hated how you could still see the wording. It was ugly.
So, I pryed up the snapping part (be careful!)
Then I found this old gift bag that I had. (you can use any scrapbook paper or material)After that, I simple turned the trap upside down, painted the edges, and modged the gift bag on to the wooden surface.
That's much better!!!!


Added some ribbon and pink rope (from the gift bag).


Then I took my hubby away from basketball for 5 minutes while we clamped down the spring trap part back on to the trap. I don't know how we would have done it without clamps!


Clamped it down tight.


Powered up the staple gun and stapled the spring back on.


I added 3 round magnets to the back, and stuck it to my fridge! Love it. Rat Trap Nasty to Rat Trap Wonder.


You could do bills, coupons, receipts, to do lists, etc. I think bills will do for my first attempt!


#2. Organizing My Car Papers

Found this bad boy for 1 dollar at a thrift store. It is a foldout coupon holder. I knew just where I needed it...... First I had to make it a little bit more pleasing to the eye.


So, I modged, and I cut, and I modged, and I waited.

And I added a little burned edges satin material under the flap, and a satin flower.


I went out to the car to find this mess below:


And made it look a little bit better using my car papers, modge podged, wonder.
Thanks for sharing in my latest obsessions! Have a great day!

post signature


Crafty Gals

More Crafty Gals

Even More Crafty Gals!

  © Blog Design by Simply Fabulous Blogger Templates

Back to TOP